
Create a Multi-step Form or Wizard Using Tabs
This page shows you how to create a multi-step form using the Tabs widget, which allows you to collect user input over multiple steps.
Prerequisites
- A Tabs widget.
- Basic knowledge of how the storeValue() function works.
Configure the Tabs
Example: lets set up a multi-step form with two tabs: one where users can input basic information, and the other where they can provide personal information.
Rename the Tabs as required. In this example, Tab 1 is renamed to
Basic Info, and Tab 2 toPersonal Info.On Tab 1 (
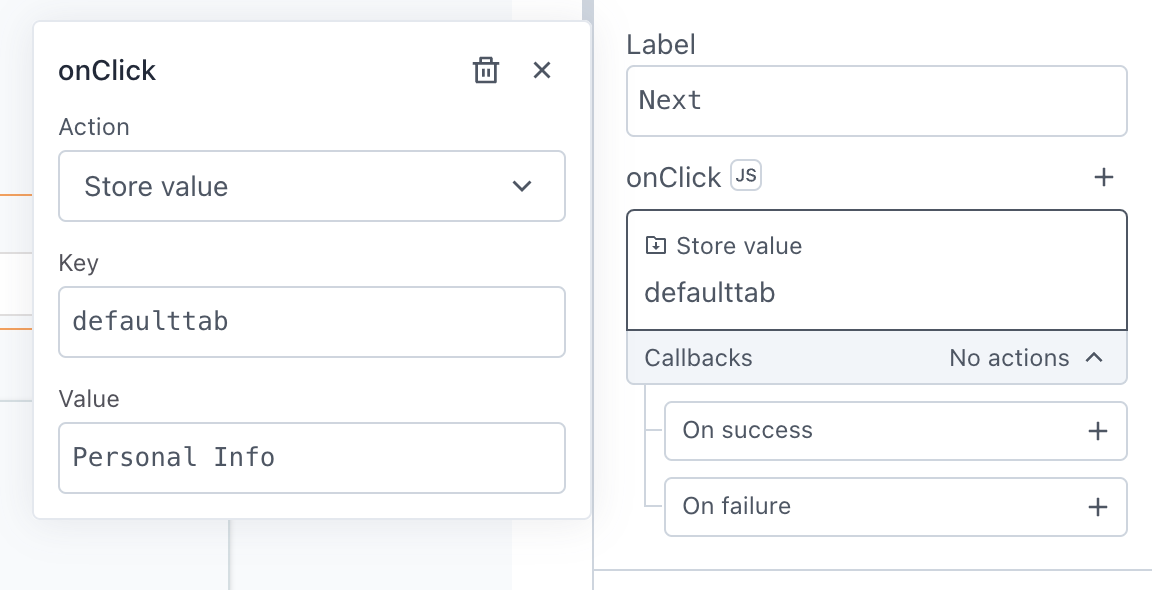
Basic Info), add a Button widget and configure its onClick event; select the Store value option from the action selector and specify:
| Field Name | Value |
|---|---|
| Key | defaulttab |
| Value | Personal Info |
In this configuration, defaulttab acts as a unique identifier, while the Value field represents the name of the tab you want to navigate to, which, in this case, is the next tab Personal Info.
This setup stores the next tab's name in the defaulttab key, which can then be used for navigation in subsequent steps.
- Similarly, on Tab 2 (
Personal Info) tab, add a new Button widget and configure its onClick event to allow users to go back to the previous tab. For this, select Store value option from the action selector and specify:
| Field Name | Value |
|---|---|
| Key | defaulttab |
| Value | Basic Info |
In this configuration, the same defaulttab key is used to store the name of the previous tab, which, in this case, is Basic Info.
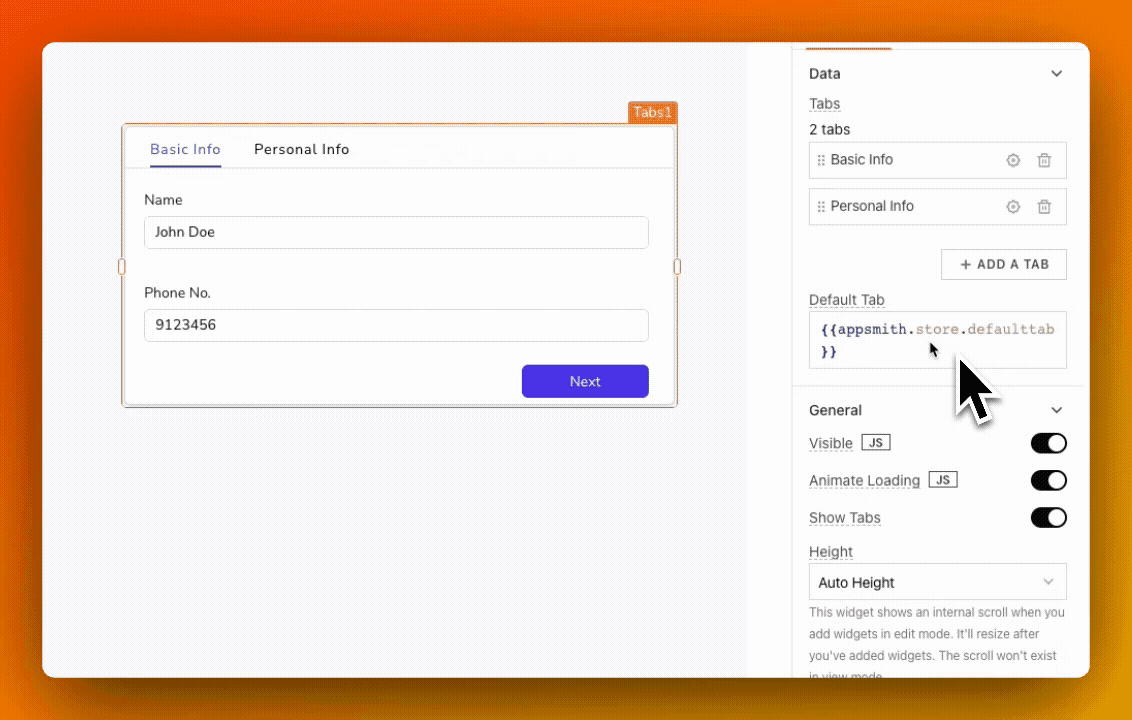
- In the Default Tab property of the Tabs widget, add the following code:
{{appsmith.store.defaulttab}}
This allows you to access the Tab name from the store using the defaulttab key.